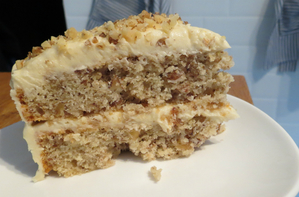
FODMAP foodie
  • Home
  • Recipes
  • News
  • Tailgating Recipes
Helping you enjoy food, while following the FODMAP process

Hazelnut, chocolate and coffee cake

3/9/2017

0 Comments

 
Chocolate, hazelnut and coffee cake
Cake Ingredients
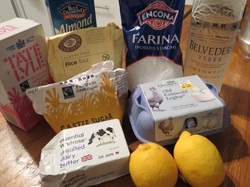
200g hazelnuts, ideally with their skins on

100g dark chocolate
1 tsp baking powder
2tsp instant coffee, mixed with 6 tsp of boiling water
100g butter
5 eggs, separated
75g caster sugar (granulated sugar for my US friends)
pinch of salt

Chocolate topping ingredients
90g dark chocolate
40g butter
Preheat your oven to 170c (340f)
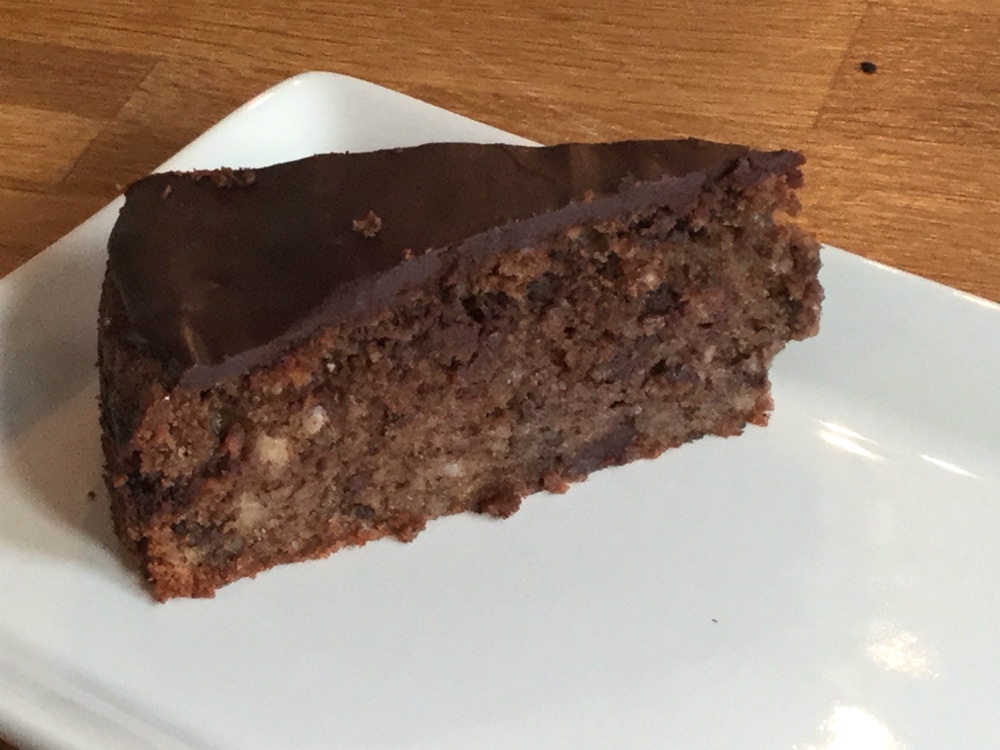
​Place the hazelnuts, chocolate and baking powder in a food processor and blitz until you have coarse crumbs.  Add the coffee and butter then blitz again until mixed.


In a large bowl, beat the egg yolks and the sugar together until light and fluffy. Add the coffee and the hazelnut mixture to the egg/sugar mixture and beat by hand until combined. Note, what you'll end up with will be a fairly firm paste like texture. 

Using an electric mixer, whisk the egg whites and the pinch of salt together until stiff. Then add one-third of the egg whites to the other ingredients and stir well to combine. This first third will help remove the paste like texture from the batter.  Add the remaining egg whites in two batches, folding in carefully to retain as much air in the mixture as possible.

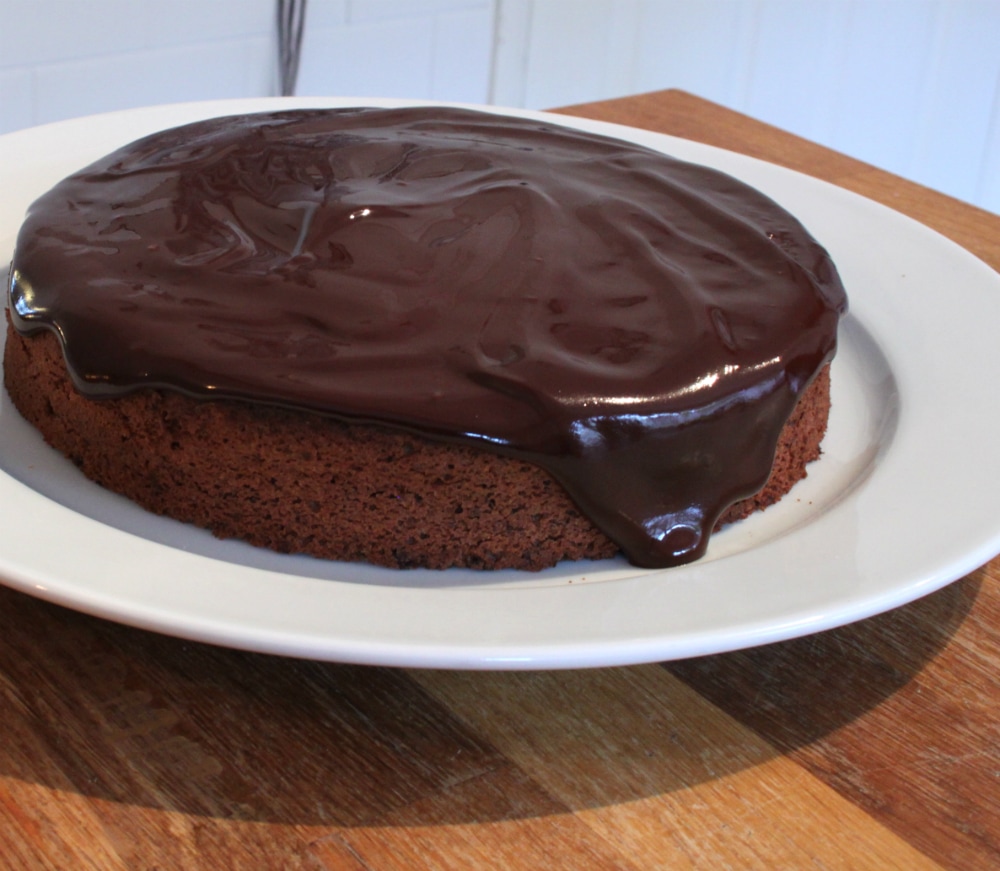
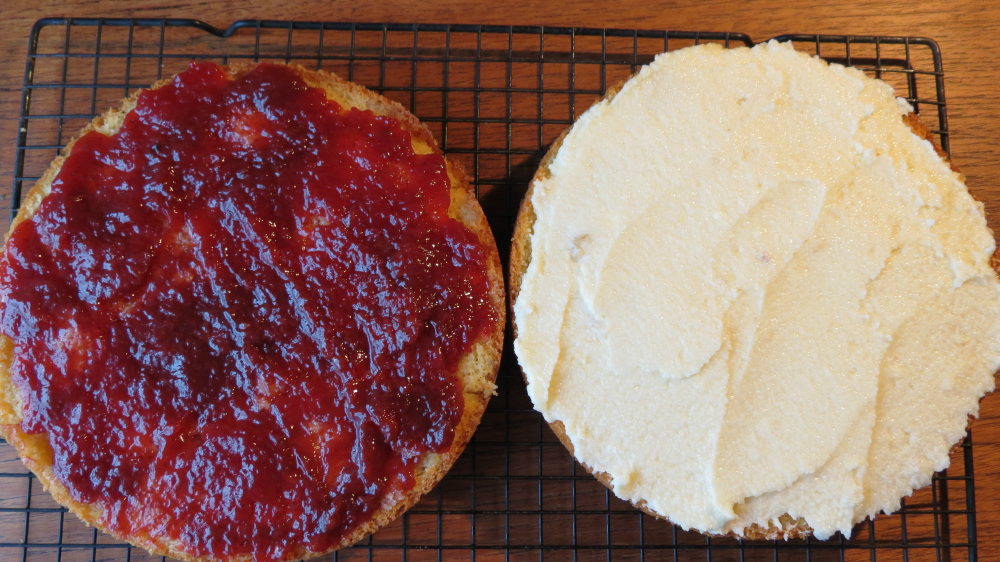
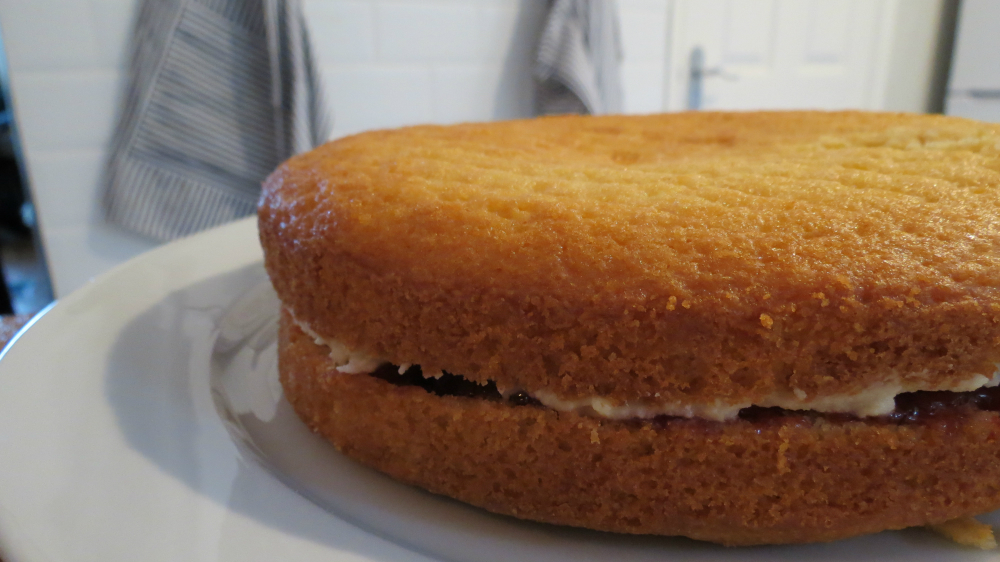
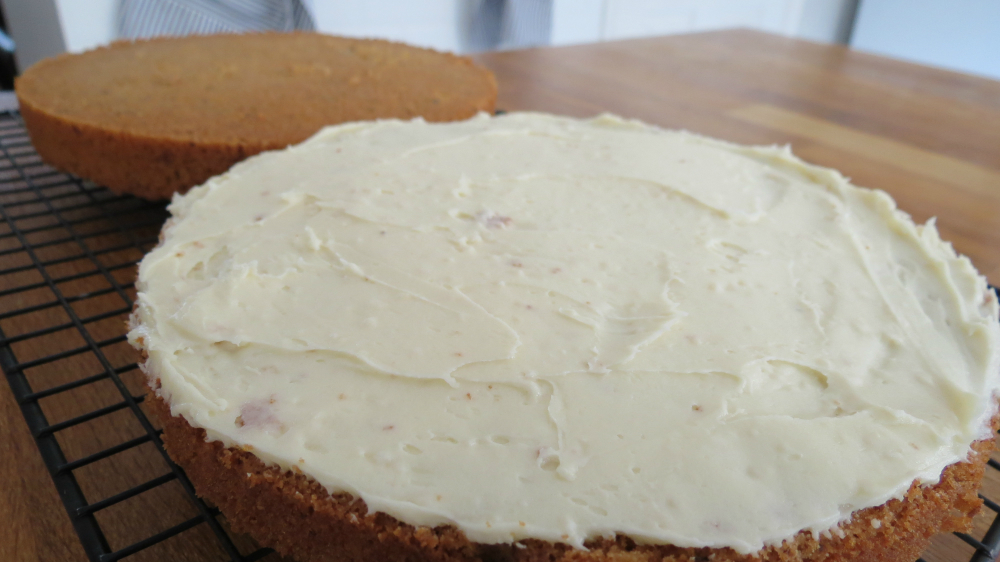
Pour the mixture into the cake tin and bake at 170°c, (340f), for about 45 minutes. Leave to cool for 5 minutes in the tin and then turn out onto a wire rack to cool completely.

To make the chocolate topping, fill a saucepan about 1/4 full with water and simmer over a medium heat. Place a mixing bowl on top of the saucepan and add the chocolate. Once the chocolate melts add the butter and stir until combined. Take the mixing bowl off the saucepan and leave to cool for 15 minutes.

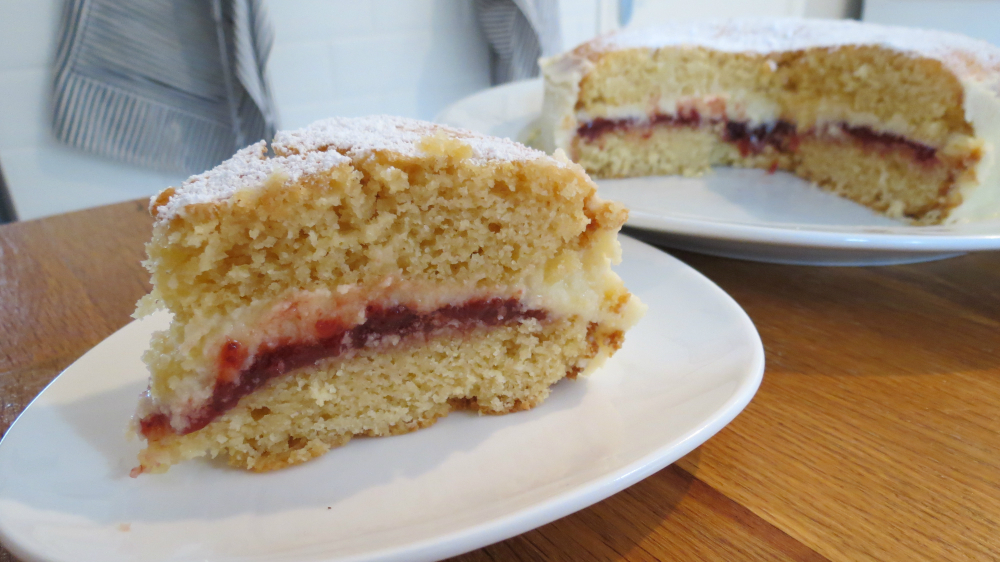
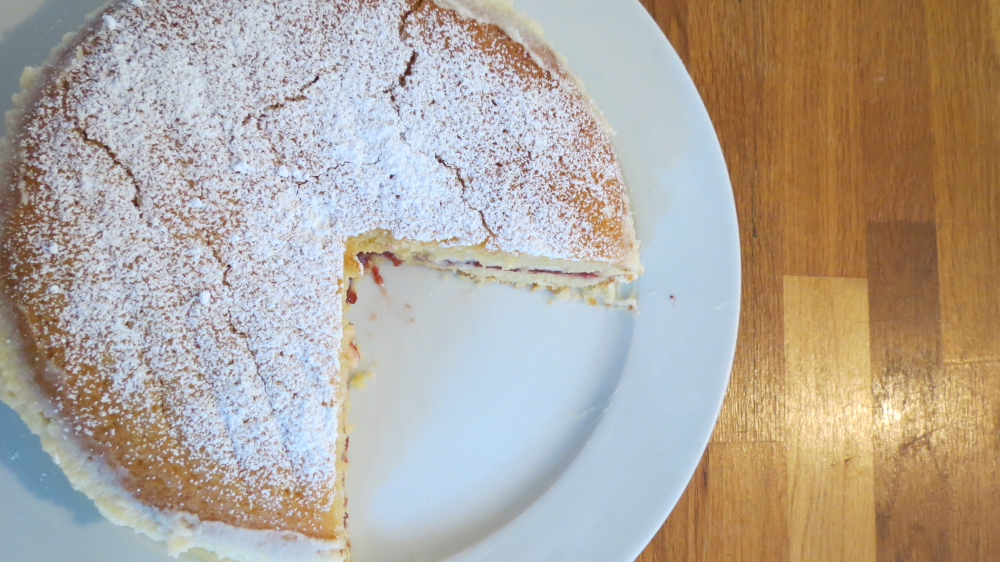
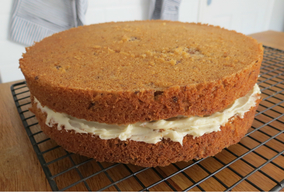
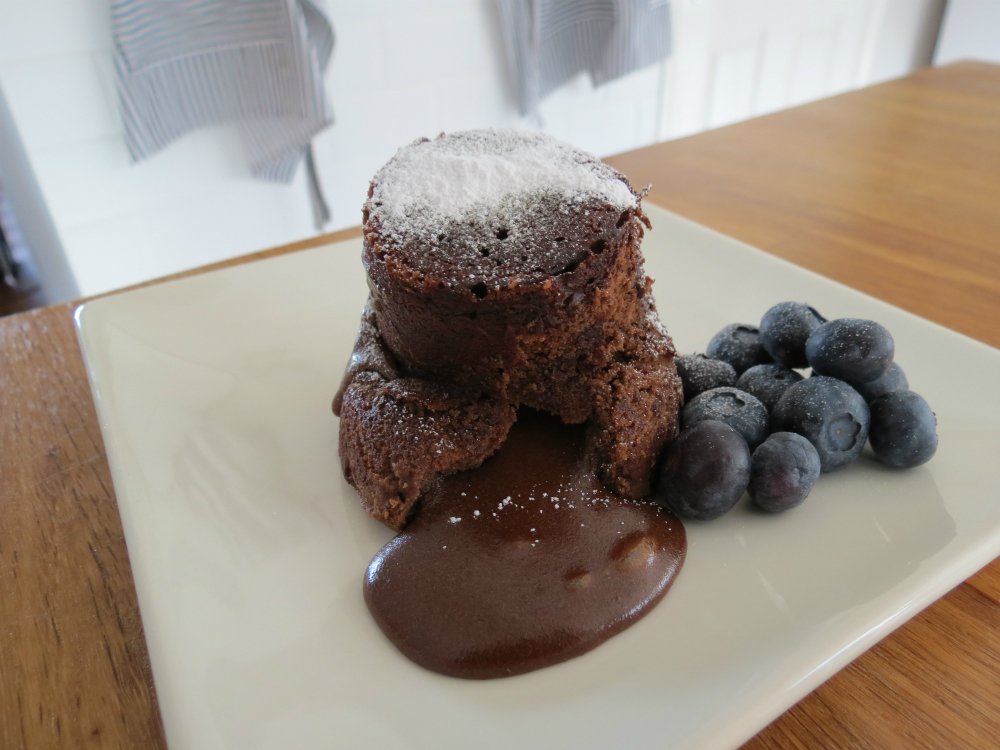
Drizzle your chocolate over the top of your cooled cake.
Hazelnut, chocolate and coffee cake
cake slice
0 Comments

low FODMAP, gluten free lemon drizzle squares

2/1/2017

1 Comment

 
low FODMAP lemon drizzle squares
Ingredients
250g caster sugar (granulated for my US friends)
250g butter
250g rice flour
3 lemons (zest and juice)
2tsp baking powder
pinch of salt
3 eggs
​
Lemon drizzle icing
150g icing sugar (powdered sugar for my US friends)
​juice of 1 lemon
Start by preheating your oven to 160 degrees celsius (320 f)

​To make my low FODMAP, gluten free lemon drizzle squares first combine the butter and sugar in an electric mixer. Mix on a high speed until pale and fluffy. Next, while mixing on a medium speed add the eggs one at a time and continue mixing until the eggs are incorporated. 

Add the lemon juice and zest then add the flour, baking powder and salt. Mix on a medium speed until all ingredients are combined. 

Pour your cake batter into a brownie tray, mine measures 30cm by 20cm by 3cm. Also, I line mine with baking parchment to make it easier to turn the cake out. 

​Bake in the oven for 30minutes, it will be golden brown on top.

While cooling on a wire rack cut into squares. Mix together your lemon juice and icing sugar by hand. Then drizzle over your squares once they cool.   
low FODMAP lemon drizzle squares
1 Comment

Low FODMAP - Gluten Free Spiced Bundt Cakes

11/30/2016

0 Comments

 
Picture of low FODMAP bunt cake
Ingredients for the cake
200g butter, softened 
200g caster sugar (granulated sugar for my US friends)
200g rice flour
2tsp baking powder
3eggs, beaten 
2tsp vanilla essence
2tbsp lactose free milk

3tsp cinnamon
1/2tsp ground cloves
1tsp nutmeg
1/4tsp ground white pepper
1/4tsp ground ginger
​1/4tsp salt

To make my gluten free, low FODMAP spiced bundt cakes, start by preheating your oven to 160c (320f).

Using an electric mixer, cream the butter and sugar together until pale and fluffy. Slowly add the beaten eggs while continuing to mix the butter and sugar. Once the eggs have been incorporated into the mix add the vanilla essence. 

While mixing on a medium speed slowly add the flour, baking powder, spices and salt. Once all the dry ingredients have been incorporated, mix in the milk. ​

Pour the cake mix into your bundt cake tins, be careful not to overfill the tins. You don't want the cakes to rise too far out. Bake for 22 minutes before turning onto a wire rack to cool. 
Picture of Low FODMAP bunt cake
0 Comments

Victoria Sponge Cake

1/16/2016

1 Comment


Low FODMAP, gluten free sponge cake. 

Low FODMAP sponge cake
For the cake
210g butter, softened 
210g caster sugar (granulated sugar for my US friends)
210g rice flour
2tsp baking powder
3eggs, beaten 
3tsp vanilla essence
2tbsp lactose free milk
a pinch of salt
Your favourite jam 
​For the icing
200g butter, softened
3tsp vanilla extract
400g icing sugar (powdered sugar for my US friends)
5tbsp lactose free milk

Preheat the oven to 160c (320f) and grease your cake tin(s). I only have one cake tin so have to make one layer at a time, if you have two cake tins you will be able to cook both layers at the same time. 

Using an electric mixer, cream the butter and sugar together until pale and fluffy. Slowly add the beaten eggs while continuing to mix the butter and sugar. Once the eggs have been incorporated into the mix add the vanilla essence. 

While mixing on a medium speed slowly add the flour, baking powder and salt. Once all the dry ingredients have been incorporated, mix in the milk. 

Divide the cake mix into two even halves. I only have one cake tin so I put half into the tin and leave the other half in the mixing bowl. The cakes take around 25 minutes to cook. When you take them out of the oven leave them to cool in the cake tin for 4-5 minutes then turn out onto a wire rack. 

Once the cakes have cooled spread your jam onto the top of one layer.

Put the butter, icing sugar and vanilla extract in a mixing bowl and beat to combine. Add the milk 1tbsp at a time. I find icing to be the one part of baking that is more of an art than a science. By adding the milk 1tbsp at a time you will be able to ensure your icing has the right consistency.

Spread icing over the top of the other layer. Then carefully place the jam and iced layers together. I like to ice the outside of my cake but this step is optional. Traditionally the sides are not iced. 
sponge cake halves
Low FODMAP sponge cake
Victoria sponge cake
Low FODMAP sponge cake
1 Comment

Low FODMAP Carrot Cake

1/3/2016

4 Comments

 
Low FODMAP carrot cake and coffee
For the cake
​200g soft light brown sugar
200ml sunflower oil
3 eggs
200g rice flour
100g ground almonds (will be low fodmap in portion size)
1tsp bicarbonate soda
1tsp baking powder
1tsp cinnamon
1tsp vanilla extract
300g grated carrots
50g chopped walnuts
For the icing
250g butter, softened
500g icing sugar (powdered sugar for my US friends)
juice of 1 lemon
2-3tbsp lactose free milk
Preheat your oven to 170c (340f), grease your cake tin(s). I only have one cake tin so have to make one layer at a time, if you have two cake tins you will be able to cook both layers at the same time. 

​Put the sugar, oil and eggs in a mixer and beat until everything is well mixed. While continuing to beat on a low speed, slowly add the flour + ground almonds 100g at a time. Then add the bicarbonate soda, baking powder cinnamon and vanilla. Continue to beat until everything is mixed. 

Turn off the electric mixer and add the grated carrot and walnuts, using a spatula mix these in by hand. Divide the mixture in half and bake each half in a separate cake tin. I bake these for about 25minutes. 

​Allow each half to cool before spreading icing. To make the icing put the butter, icing sugar and lemon juice in a mixing bowl and combine. Add the lactose free milk 1tbsp at a time. I find icing to be the one part of baking that is more of an art than a science. By adding the liquid 1tbsp at a time you will be able to ensure your icing has the right consistency. If you find you need more than the 3tbsp I have suggested then add lactose free milk until you have the consistency of icing you desire. 
Low FODMAP carrot cake halves
Low FODMAP carrot cake
carrot cake slice
4 Comments

Coffee and Walnut Cake - Low FODMAP

8/17/2015

0 Comments

 
For the cake
225g rice flour
100g walnuts, finely chopped
2tsp baking powder
225g butter, softened 
225g caster sugar (granulated sugar for my US friends)
4eggs, beaten 
6-7tbsp cold coffee
For the icing
250g butter, softened
1tsp vanilla extract
500g icing sugar (powdered sugar for my US friends)
2-3tbsp cold coffee
walnuts to decorate
Preheat the oven to 160c (320f) and grease your cake tin(s). I only have one cake tin so have to make one layer at a time, if you have two cake tins you will be able to cook both layers at the same time. 

Chop the walnuts finely, if they are too large they will sink to the bottom of the cake. Mix the finely chopped walnuts, rice flour and baking powder together in a mixing bowl. 

Using an electric mixer, cream the butter and sugar together until pale and fluffy. Slowly add the beaten eggs while continuing to mix the butter and sugar. 

Gently fold the flour mix into the butter/sugar/egg mix by hand using a spatula. 

Divide the cake mix into two even halves. I only have one cake tin so I put half into the tin and leave the other half in the mixing bowl. The cakes take around 22 minutes to cook. When you take them out of the oven leave them to cool on a wire rack. 

Once the cakes have cooled use a pastry brush to brush the coffee onto the top of each layer. 
Picture
Picture
Put the butter, icing sugar and vanilla extract in a mixing bowl and beat to combine. Add the cold coffee 1tbsp at a time. I find icing to be the one part of baking that is more of an art than a science. By adding the cold coffee 1tbsp at a time you will be able to ensure your icing has the right consistency. If you find you need more than the 3tbsp I have suggested then add coffee until you have the consistency of icing you desire. 

Once you have spread the icing over the cake decorate the top of the cake with walnuts. Enjoy your low FODMAP, gluten free cake!
Low FODMAP coffee and walnut cake
Low FODMAP coffee cake
0 Comments

Chocolate Fondant

3/11/2015

0 Comments


Low FODMAP, gluten free chocolate fondants

100g Dark chocolate
100g Butter
100g Caster Sugar (granulated sugar)
2 Eggs and another 2 egg yolks
100g Rice flour
Butter for greasing
Coca for dusting

(makes 4 chocolate fondants)
The first step is preparing the moulds, fondants can be a little tricky to get out of the mould at the end so preparation is key. Using a sheet of kitchen paper rub the inside of each mould with butter to grease the mould. Then cover the mould in cling film and place in the fridge for an hour. After an hour remove the cling film and rub another coat of butter in the moulds. Lightly dust the inside of the moulds with coca powder. You will not need much coca powder at all, it's a light dusting that sticks to the butter. Wrap the moulds in cling film and place in the fridge for another hour. 
Place a mixing bowl over a pan of simmering water, ensuring the water does not touch the pan. Slowly melt the chocolate and butter together in this mixing bowl. Once melted, remove the bowl from the pan of water and stir the melted chocolate/butter until smooth. Leave to cool on the kitchen bench. 
In another bowl whisk the eggs and sugar together until thick and fluffy. Sift the flour into this egg mixture and whisk until combined. Pour the cold chocolate mix into the egg mix in thirds, ensure the ingredients are combined before adding the next third. Once all the chocolate and egg mixture is combined tip the fondant batter into the moulds. Cover the filled moulds in cling film and refrigerate for at least two hours. 
Heat your oven to 200c (390f). Take the fondant moulds from the fridge and remove the cling film. Place the moulds on a baking tray and cook in the oven for 11 minutes. Remove from the oven and leave to sit for 1 minute. Then run a knife between the fondant and the edge of the mould before turning them out onto a plate.  
Picture
0 Comments

Dark Chocolate Brownies 

9/29/2014

0 Comments

 
Picture
250g unsalted butter
300g dark chocolate (70% coca)
260g light muscovado sugar
4tbsp water
5 eggs
100g ground almonds (the serving size will be low FODMAP)
pinch of salt
My low FODMAP, gluten free brownies for your baking enjoyment. 

Start by preheating your oven to 170c (340f)

Break the chocolate into small pieces and place in a large heatproof mixing bowl. Then cut the butter into small chunks and add to the mixing bowl with the chocolate. 

Put the sugar and water in a non-stick frypan and stir slightly to mix. Bring this to the boil over a medium heat. Be careful here, boiling sugar is extremely hot! Do not touch it or put a spoon in your mouth after it has touched the boiling sugar. Pour the boiling sugar syrup into the mixing bowl containing your chocolate and butter. Stir well until the butter and chocolate have both melted and you are left with a runny chocolate sauce. 

Separate your eggs and add the egg yolks to the chocolate sauce one at a time, stirring each egg yolk in before adding the next. Finally add your ground almonds and stir until combined. Set this mixing bowl aside. 

 Take the egg whites and salt and whisk them to a firm meringue. In the time it takes you to do this the chocolate mix should have come to room temperature. Once the chocolate mix it at room temperature gently fold in the egg whites one third at a time. You want the egg whites to be incorporated but you need to do it gently over time rather than quickly stirring them in. The idea is to ensure you do not lose the air from the egg whites. 

Once the egg whites are incorporated pour the mixture into your brownie tray and place in the oven for 30 minutes. After 30 minutes take the tray out of the oven and leave to cool on the bench for 5 minutes. After this 5 minutes of cooling you can turn the block of brownies out of the tray and leave to cool on a wire rack. Do not try to cut the brownies into squares until they are completely cool. This may take several hours. 

Finally, these are very strong brownies! When you cut them make sure you only cut them into pieces that are two or three bites in size. Serve with tea or coffee and enjoy!
Picture
0 Comments

Lemon drizzle cake

5/4/2014

0 Comments

 
Picture
180g unsalted butter at room temperature
130g rice flour
130g potato starch
2tsp baking powder
200g caster sugar
90ml your choice of lactose free milk
zest of 2 lemons
juice of 1 lemon
2 eggs

For the lemon drizzle
100g icing sugar
juice of 1/2 lemon
10ml vodka
Start by preheating your oven to 180c (355f) and grease your loaf tin.

Place the butter and sugar in an electric mixer and mix on a medium speed until fluffy. In a separate jug combine the eggs and milk. Now add the milk mixture to the sugar mixture a little at a time, continuing to mix on a slow speed. Once all the milk mixture and sugar mixture are combined, add the rice flour, potato starch, baking powder, lemon zest and juice. Work in by hand using a spatula. 

When all ingredients are mixed together pour the batter into your loaf tin and put in the oven for about 50 minutes.  While the cake is cooling on a wire rack combine the icing sugar, lemon juice and vodka in a small mixing bowl. The consistency should be very runny, you want a liquid to drizzle over the cake, not icing to spread on a cake. 

Once the cake has cooled use a skewer to push several holes in the top if the cake. The idea is to have small openings for the drizzle to enter, you could make them with a small, sharp knife if you prefer. Now slowly pour the drizzle over the cake a little at a time. You want the cake to absorb it rather than have it all running down the sides. 

Wait about half an hour for the drizzle to set then enjoy your low FODMAP lemon drizzle cake!
Picture
0 Comments

New York baked cheesecake

8/27/2013

2 Comments

 
baked cheesecake
For the base
50g butter
125g oats
35g sugar
2tbsp golden syrup
1tsp vanilla extract

For the cake
900g lactose free cream cheese
190g caster  sugar
1 vanilla pod
4tbsp lemon curd
4 eggs
gluten free cheesecake base
Start by preheating your oven to 150C (300F)

Gently melt the butter, sugar, vanilla and syrup in a pan. Once all the ingredients are melted thoroughly mix the heated mixture and oats together in a mixing bowl. Spread the oat mix into a cake tin to form the base. If you find the mixture too sticky to spread, just wet the back of your spoon with a splash of water and it will stop sticking.

To make the cake itself, put the lactose free cream cheese (I use https://www.arlafoods.co.uk/brands/lactofree/) and sugar into a mixing bowl. Cut the vanilla pod down the length and use the back of a teaspoon to scoop out the vanilla. Put this in with the sugar and cream cheese. Finally add 4tbsp of lemon curd and mix together on a low speed. You can follow my lemon curd recipe here, it is much tastier than store bought versions.

Continue mixing the ingredients together on a low speed and add the eggs one at a time, once all the ingredients are combined, mix on a medium speed for 30 seconds.

Tip the cheesecake mix into the cake tin and bake for about two hours. You want to take it out when the edges are firm and slightly brown but the middle is still slightly soft. Once cooked leave the cake in the tin to cool for 15 minutes, this will make it much easier to remove the cake from the tin.

While  you can eat the cake as soon as it cools, I would strongly recommend putting it in the fridge overnight once it is cool. A day in the fridge really brings out the flavour!
New York baked cheesecake
2 Comments
<<Previous

    About me

    Ice hockey playing, college football watching, art deco collecting, IT tech come home baker. Once described as Renaissance man.

    In short, if I can cook it you can cook it too.

    Categories

    All
    Biscuits
    Bread
    Brunch
    Cake
    Christmas
    Ingredients
    Muffins
    Sorbet & Ices
    Tarts

    Archives

    May 2018
    June 2017
    March 2017
    February 2017
    November 2016
    October 2016
    September 2016
    August 2016
    April 2016
    February 2016
    January 2016
    November 2015
    September 2015
    August 2015
    June 2015
    April 2015
    March 2015
    December 2014
    October 2014
    September 2014
    August 2014
    July 2014
    June 2014
    May 2014
    April 2014
    August 2013
    July 2013
    June 2013
    May 2013

    RSS Feed

Powered by Create your own unique website with customizable templates.